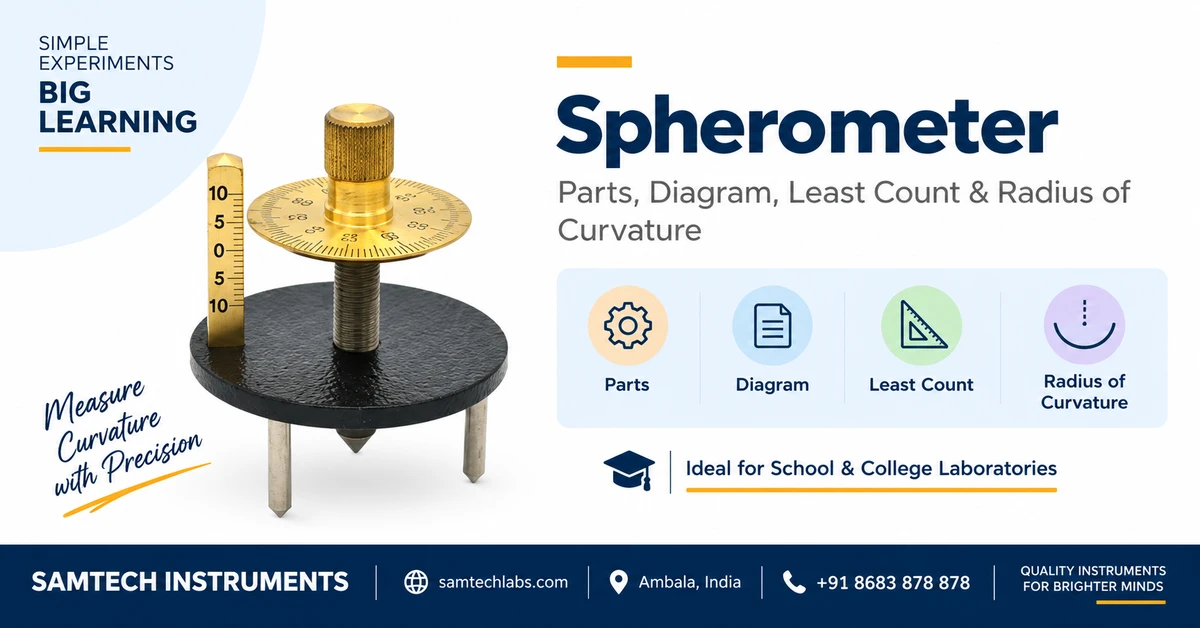
A spherometer is a precision instrument used to measure the radius of curvature of a spherical surface (such as a lens or mirror) and the thickness of thin plates. It has three fixed legs forming a stable tripod and a central screw with a circular disc scale, giving a least count of 0.01 mm. This guide covers its parts, the least count and radius-of-curvature formulas, and how to take an accurate reading step by step.
Key takeaways
A spherometer measures the radius of curvature of spherical surfaces and the thickness of thin plates — it is the only one of the three classic “least count” instruments built specifically for curvature.
Least count = Pitch ÷ number of circular scale divisions, typically 1 mm ÷ 100 = 0.01 mm.
Radius of curvature: R = l²/6h + h/2, where l is the mean distance between the three legs and h is the sagitta (height difference from the flat-plate reading).
Always take a flat-plate zero reading first — the sagitta h is meaningless without it.
It belongs to the same measuring-instrument family taught alongside the vernier caliper and screw gauge in CBSE/ISC Class 11 physics practicals.
What is a spherometer?
A spherometer is a precision measuring instrument designed to determine the radius of curvature of a spherical surface — the curved face of a lens, a concave or convex mirror, or a watch glass — and the thickness of thin plates or sheets. The name comes from its original purpose: measuring the curvature of surfaces that form part of a sphere.
It works on the same screw-thread principle as a screw gauge: a central screw with a fine pitch is turned by hand, and one full rotation advances it a fixed, known distance. Because the surface being tested is curved rather than flat or linear, a spherometer needs a stable three-point base to reference the surface, which is why it looks different from a vernier caliper or screw gauge even though the reading mechanism (main scale + circular scale) is nearly identical.
You’ll find a spherometer on the equipment list for CBSE and ISC Class 11 physics practicals (under “Measurements”), in college optics labs, and on the quality-control bench in lens-grinding and ophthalmic-lens workshops, where checking the curvature of a freshly ground lens surface against specification is a routine task.
Parts of a spherometer (labelled diagram)
A spherometer has four legs in total: three fixed legs that form a stable equilateral triangle, and one central moving leg attached to the fine screw that is raised or lowered by turning the milled head. The diagram below labels each part.
Fig. 1 — Side view of a spherometer resting on a convex test surface (e.g. a lens), showing the frame, screw assembly and the three fixed legs.
Three fixed legs: Form a rigid tripod base. Their tips rest on the surface being measured (or on the flat reference plate for the zero reading). Being fixed, the distance between them (l) stays constant for a given instrument.
Central leg (moving leg): Attached to the tip of the fine screw. It is the only leg that moves — turning the milled head raises or lowers it relative to the three fixed legs.
Main / pitch scale: A vertical scale, fixed to the frame and graduated in millimetres, that shows how far the screw has travelled up or down.
Circular (disc) scale: A rotating disc attached to the screw, usually divided into 100 equal parts, used together with the main scale to read fractions of a millimetre.
Milled head: The knurled knob on top of the screw, turned by hand (or by a ratchet on some models) to raise or lower the central leg.
Frame / yoke: The rigid metal body that holds the three fixed legs and the central screw mechanism in a fixed geometric relationship to each other.
Spherometer least count formula
The least count (LC) is the smallest length the instrument can resolve. It is calculated the same way as for a screw gauge:
Least count formula
Least Count = Pitch ÷ Number of divisions on the circular scale
For a typical spherometer with a pitch of 1 mm and 100 divisions on the circular scale:
LC = 1 mm ÷ 100 = 0.01 mm
A least count of 0.01 mm means the instrument can reliably resolve differences as small as one-hundredth of a millimetre in the sagitta — which is exactly the precision needed, since the radius-of-curvature formula (below) is highly sensitive to small errors in h.
How to use a spherometer: step-by-step
The goal is to find the radius of curvature (R) of a spherical surface. This needs two measurements: the sagitta (h) — how much the central leg has to move between a flat reference and the curved surface — and the mean distance between the legs (l).
Take the flat-plate (zero) reading. Place the spherometer on a truly flat glass plate. Turn the milled head until the central leg just touches the plate — no more, no less. Note the main scale reading (MSR₀) and the circular scale reading (CSR₀) where it lines up with the reference index. This is your reference reading, h₀.
Record the leg positions. Press the three fixed legs gently onto a sheet of paper (or soft carbon paper over plain paper) to mark their tips. Do this once — the triangle they form stays the same for every surface you test with this instrument.
Place the spherometer on the test surface (the lens or mirror whose curvature you want to find), with all three fixed legs resting on it. Turn the screw again until the central leg just touches the curved surface. Note this reading, h₁.
Calculate the sagitta. h = difference between the curved-surface reading (h₁) and the flat-plate reading (h₀), taken as a positive value regardless of direction: h = |h₁ − h₀|.
Measure l, the distance between the legs. On the paper marks from Step 2, measure the distance between each pair of leg-marks (three sides of a triangle) with a ruler or vernier caliper, then take the average of the three. This average is l.
Apply the radius of curvature formula:R = l² / 6h + h / 2. Substitute your measured l and h (both in the same unit, usually mm) to get R.
Worked example
Suppose a student measures, for a convex lens surface:
Mean distance between the legs, l = 30 mm (3.0 cm)
Sagitta, h = 0.9 mm (from a flat reading of, say, 5.20 mm and a curved reading of 6.10 mm)
Applying the formula:
R = (30)² / (6 × 0.9) + 0.9 / 2
R = 900 / 5.4 + 0.45 = 166.67 + 0.45 = 167.12 mm ≈ 16.7 cm
So the surface has a radius of curvature of approximately 16.7 cm. The same formula and procedure apply to a concave surface — only the value of h changes, since the central leg has to travel a different distance to reach the surface.
Spherometer vs vernier caliper vs screw gauge
These three instruments are taught together in Class 11 physics practicals because they share the same main-scale-plus-graduated-scale reading method, but each is built for a different job. Here’s how they compare:
Physics practicals (Class 11-12): The standard CBSE/ISC experiment “to determine the radius of curvature of a given spherical surface (convex or concave) by a spherometer.”
Optics and lens-testing labs: Verifying the curvature of a lens or mirror surface against its design specification.
Lens manufacturing & ophthalmic workshops: Quality-control checks during and after the lens-grinding process, before a lens is edged and fitted.
Thin-plate and sheet-thickness measurement: Because the three fixed legs and the central leg both rest on the same surface, a spherometer can also measure the thickness of a thin flat plate placed under the central leg only.
College engineering & workshop labs: Wherever a screw gauge is used for linear precision, a spherometer covers the curved-surface case.
Which spherometer should you buy?
School physics lab
For CBSE/ISC Class 11-12 practicals covering the standard radius-of-curvature experiment.
0.01 mm least count is sufficient
Stainless-steel legs resist daily student handling
Buy in sets matching batch size
College optics lab
For repeated lens and mirror curvature checks across multiple experiment groups.
Look for a smooth, low-friction screw for repeatable readings
A rigid frame reduces flex-related reading errors
Pair with a flat reference glass plate
QC / lens manufacturing
For quality checks on ground or moulded lens surfaces against a target curvature.
Prioritise legs of equal, precisely-matched length
Request calibration documentation
Consider bulk/institutional pricing for multiple benches
Common mistakes & accuracy tips
Skipping the flat-plate reading: Without h₀, there is no valid sagitta and the radius calculation is meaningless. Always zero on a flat reference plate first.
Not checking for zero error: If the circular scale doesn’t read exactly zero when the central leg touches the flat plate at true contact, note the zero error and apply the correction (with sign) to every subsequent reading, exactly as with a screw gauge.
Screwing down too hard: Over-tightening on the test surface can flex the frame or scratch a soft lens surface. Turn gently until contact is just made — many models include a ratchet stop for this reason.
Measuring l only once: A single leg-to-leg distance can be slightly off if the paper impression smudges. Measure all three sides of the triangle and average them.
Mixing units: Keep l and h in the same unit (usually mm) before substituting into R = l²/6h + h/2, or the result will be off by orders of magnitude.
Why choose Samtech Instruments
Samtech Instruments has manufactured precision lab equipment in Ambala, Haryana since 2002, supplying schools, colleges and institutions across India.
0.01 mm precisionSpherometers built to the standard least count used in board-level practicals.
Manufacturer-direct pricingNo middlemen — order direct from the Ambala factory.
School & institution supplyBulk orders, GST invoicing and pan-India delivery.
Full measurement-instrument rangeSpherometers, screw gauges and vernier calipers from one manufacturer.
spherometer usesspherometer diagram class 11least count of spherometerspherometer priceradius of curvature formulaspherometer experiment class 11spherometer vs screw gauge
Frequently asked questions
What is the least count of a spherometer?
Usually 0.01 mm. It’s calculated as pitch ÷ number of divisions on the circular scale — for a common 1 mm pitch with 100 divisions, that’s 1 ÷ 100 = 0.01 mm.
What is the formula for radius of curvature using a spherometer?
R = l²/6h + h/2, where l is the mean distance between the three fixed legs and h is the sagitta — the difference between the curved-surface reading and the flat-plate reading.
What is a spherometer used for?
Measuring the radius of curvature of lens and mirror surfaces and the thickness of thin plates. It’s used in optics labs, lens-manufacturing quality control, and CBSE/ISC Class 11 physics practicals.
How is a spherometer different from a screw gauge or vernier caliper?
All three read to a similar precision (0.01-0.02 mm), but a screw gauge measures thickness or wire diameter, a vernier caliper measures length, diameter and depth, while a spherometer’s three-legged base is built specifically to measure curvature.
Why take a flat-plate reading before measuring a curved surface?
The flat-plate reading is the zero reference (h₀). The sagitta h used in the radius formula is the difference between this reading and the curved-surface reading, so without it there’s nothing to subtract from.
Who manufactures spherometers in Ambala?
Samtech Instruments manufactures precision spherometers and other lab measuring instruments in Ambala, Haryana, supplying schools and colleges across India since 2002.
Written bySamtech Instruments Editorial Team — physics & laboratory equipment manufacturer, Ambala, Haryana.
Reviewed bySamtech Instruments Technical & Quality Team, for measurement accuracy and specification consistency.
How to set up a STEM lab in a school: room layout, a STEM kit list by subject and class, cost factors and ATL grant rules, from STEM kits manufacturer Samtech Instruments.